venerdì 29 maggio 2009

Tapas!

Love is in the air.. sha la la la la la..
Cioè, summer! però mi piace la canzone! E se penso all'estate, penso alla splendida vacanza che ho fatto lo scorso anno a Barcelona con Claudia, la nostra prima vacanza da sole insieme, due sorelle all'avventura! Ha organizzato tutto lei, il percorso, cosa vedere, dove mangiare, soprattutto dove mangiare! Sorelle mica per caso, eh?!

Vi regalo alcuni scatti della sorella, la fotografa ufficiale della famiglia.

Ecco il Palau de la Musica catalana

Tappa d'obbligo a Parc Guel - sotto un sole pazzesco ci ha salvato soltanto l'Aquarius, buonissimo!

E poi, ovviamente, la Boqueria. Un giorno non ci è bastato, ci siamo dovute tornare anche il giorno dopo, e quello dopo ancora, attratte dai colori, dai profumi, dalla vivacità del posto e dalla cortesia della gente. Abbiamo mangiato di tutto nell'ordine dettato dal caso... smoothies rinfrescanti, pizza con il chorizo, spiedini di pollo e poi di nuovo macedonia.
Avevamo anche deciso di trasferirci definitivamente lì, magari in un appartamentino in affitto, tipo Casa Bathllo, ah ah!


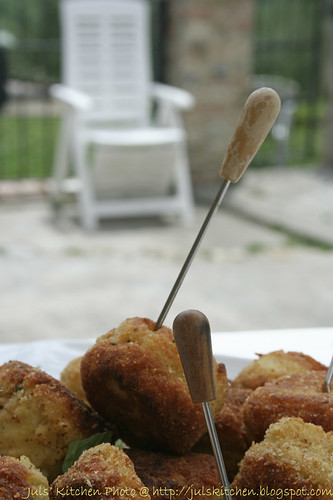
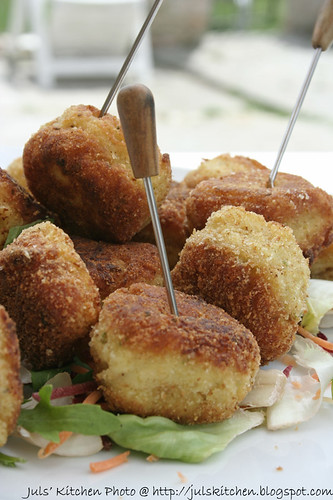
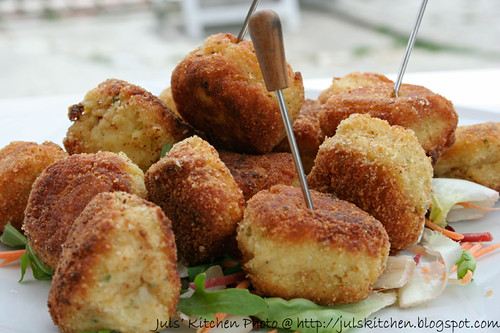
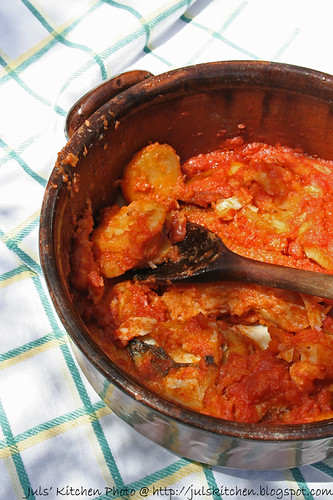
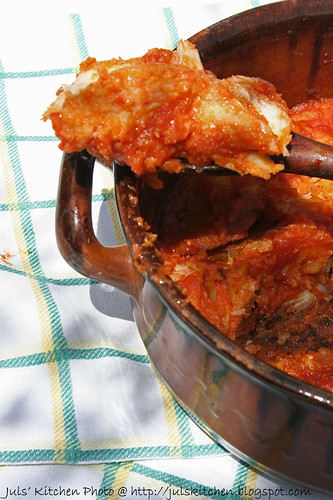
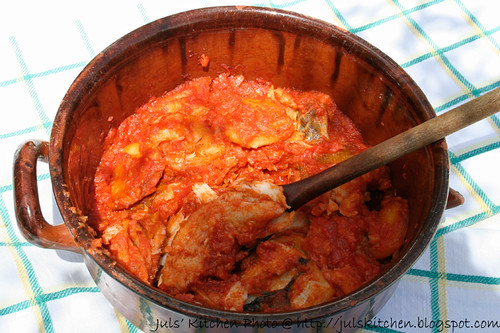
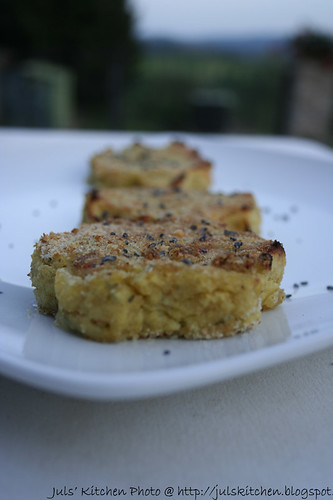
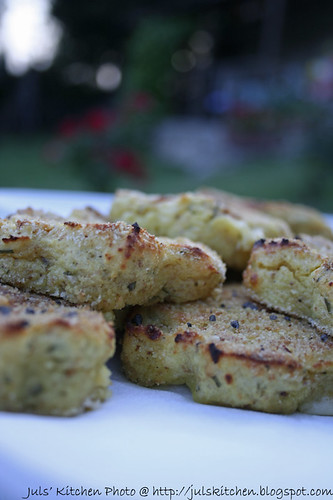
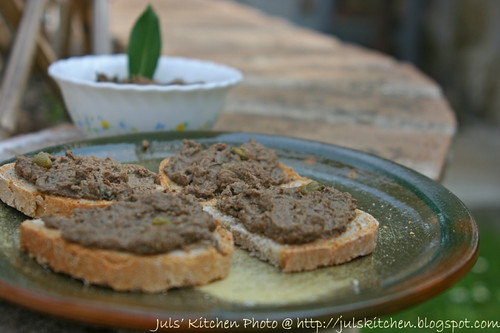
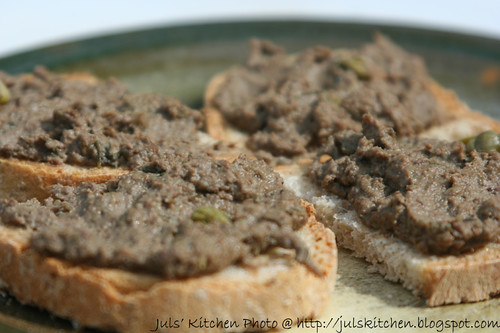
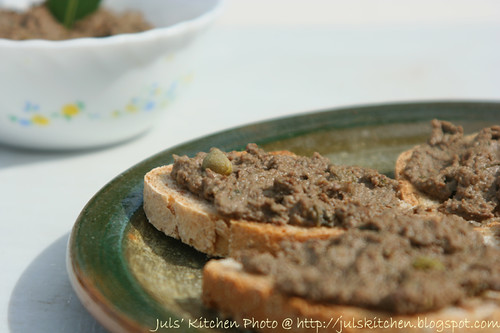
Insomma, sull'onda di questi splendidi ricordi, Claudia mi ha chiesto di farle le polpettine di baccalà che avevamo mangiato a Barcellona il nostro primo giorno. Con l'avanzo del toscanissimo baccalà alla fiorentina ecco quindi nascere le crocchette di baccalà e patate, perfette per essere usate come tapas!.

::::: CROCCHETTE DI BACCALA' E PATATE :::::


Ingredienti per 20 polpettine:
  • baccalà ammollato, 200 gr
  • patate, 300 gr
  • uovo, 1
  • pangrattato, 2 - 3 cucchiai
  • aglio, 1/2 spicchio
  • prezzemolo tritato abbondante
  • sale qb
  • olio per friggere
La procedura è estremamente semplice.
Lessa il baccalà in acqua senza sale fino a che non è morbido.

Lessa anche le patate precedentemente sbucciate e fatte a cubetti in acqua salata, questa volta.
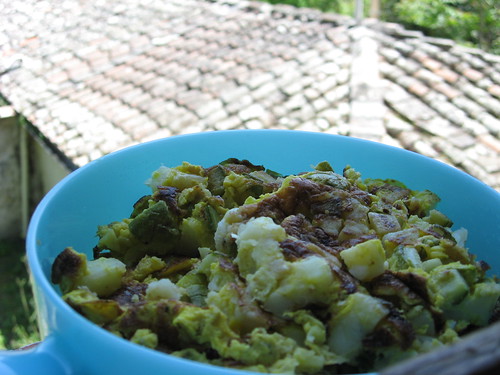
Una volta cotte, schiacchia bene le patate con la forchetta ed uniscici il baccalà ridotto in piccoli pezzettini. Aggiungi l'uovo ed amalgama il tutto.
Aggiungi poi 2 - 3 cucchiai di pangrattato a seconda delle necessità per assodare, il prezzemolo e l'aglio tritato.
Forma con le mani delle piccole polpettine aiutandoti con il pangrattato e mettile tutte in fila in un piatto. Scalda l'olio per friggere e metti le polpettine a friggere poche per volta, facendole dorare da tutti i lati.
Mettile ad asciugare su carta assorbente e servile calde.

Vi lascio queste tapas per intrattenervi!
Ci sentiamo mercoledì... domani vado in Puglia per un luuungo weekend!


::::: TAPAS: DRIED COD AND POTATO CAKE :::::

Summer is coming, and when I look back on last year holidays, I can't stop dreaming about my first solo holidays with my sister: three days in Barcelona. We loved everything, especially the huge market La Boqueria. We tried everything, from smoothies to chorizo pizza, to fresh fruit salads. We loved the buzz, the joy, the kindness of people working there.
As I had some leftover dried cod, Claudia asked me to make some cod and potato cakes, like the ones we ate in Barcelona as tapas.


Ingredients for 20 little cakes:
  • dried cod previously soaked, 200 gr
  • potatoes, 300 gr
  • egg, 1
  • breadcrumbs, 2 - 3 tablespoons
  • garlic, 1/2 clove
  • chopped parsley
  • salt
  • frying oil
They are easy making fish cakes.
Boil the cod in hot unsalted water until tender.
Peel and chop potatoes and boil them in salted water 'till tender.
Mash potatoes with a fork and add the codd, previously reduced in small pieces.
Mix all together and add one whisked egg.
Add 2 - 3 tablespoons of breadcrumbs according to necessity, then add parsley and garlic, finely chopped.
Make little round cakes with your hands, using some breadcrumbs to help you.
Heat frying oil in a large pan and fry just a few cakes per time, until they are golden on each side. Serve them hot.

I'm going to Apulia for a long weekend, so talk to you on Wednesday.
In the meanwhile, help yourself with my tapas!

mercoledì 27 maggio 2009

La cucina di nonna Menna: baccalà alla fiorentina

E' mercoledì! e il mercoledì cosa succede?
Juls si sposta su Made in Kitchen.


Oggi
baccalà alla fiorentina, all'uso di nonno Remigio.
Andate su Made in Kitchen per scoprire quale sia l'ingrediente in più che nonno aggiungeva al baccalà rispetto alle ricette canoniche, prima tra tutte quella di Pellegrino Artusi.


::::: DRIED COD FOLLOWING THE FLORENTINE'S WAY :::::

My grandfather Remigio used to live all alone in San Gimignano.
He brought up mum and aunt Silvana all by himself. He was a man of old times, a mason, but he was also very good in cooking. He loved dried cod and herring: he used to fry herring in his tiny kitchen and you could tell it from miles.. the whole house was surrounded by smell and smoke!
He used to take me to pick up pine-seeds to the public garden and he taught me how to break them with a little hammer.
He used to have a peculiar breakfast coming home from his vegetable garden: tuscan bread, tomatoes and onion!

This is how my grandfather Remigio used to cook salted cod: he added potatoes to the traditional recipe, which add softness and taste.

Fancy a spoonful?

Ingredients for 4 people:
  • dried cod previously soaked, 500 gr
  • ripe tomatoes, 600 gr
  • medium potatoes, 2
  • garlic, 1 clove
  • onion, 1/2
  • white flour, a bit to flour the cod
  • salt & pepper
  • parsley to decorate
Cut the cod into 5 cm chunks. Pad them with some paper and flour them on both sides.
Peel potatoes and cut them into thin slices, then flour them too.
Fry cod chunks in a large non-stick pan until slightly golden. At the end, fry potatoes too.
Set aside in a dish with some cooking paper to loose extra olive oil.
In the meantime, make the tomato sauce.
Heat 3 tablespoons of extra virgin olive oil in a non-stick pan with a whole garlic clove and some finely chopped onion. Add 2 tablespoon of water to cook through the onion: it is supposed to be tender. Add the tomatoes, cut into small pieces, season with pepper and cook for at least 15 minutes, until it gets a liquid but thick tomato sauce.
Put cod and potatoes in a terracotta saucepan and cover with tomato sauce. Add salt only if needed.
Reduce to a simmer and cook for 5 minutes, so that all the flavours will be mixed together.
Sprinkle with some parsley and serve hot.


martedì 26 maggio 2009

Torta di rose | Rose cake

Come promesso ieri, ecco la sorpresa! Sorpresa perché non credevo proprio che mi riuscisse... sapete benissimo che io e i lieviti siamo come Superman e la criptonite, come il diavolo e l'acquasanta... le mie mani hanno la capacità di sgonfiare tutto, garantito!
Ma in più riprese mi hanno detto di provare, di affrontare la sfida con tranquillità, perché il lievito non morde e sicuramente se seguo tutti passi con serenità poi la pasta deve lievitare.
Bene, l'occasione c'era, ed era la festa della mamma, circa due settimane fa.
Mia mamma adora le rose: ha cespugli di rose bianche, rosa, gialle e rosse sparse per il giardino, le coccola, le bagna, taglia quelle secche e conta i boccioli per sapere quante ne nasceranno.
Le annusa sempre rapita ed è molto fiera di loro.
Io e mamma siamo in continuo battibecco, è il nostro modo di comunicare: dal di fuori sembra sempre che si sti litigando, ma se ci guardano da vicino si vede che sorridiamo... sarà che lei è un po' sorda e allora alziamo la voce tutte e due?
Insomma, la mia mamma è come tutte le mamme, la migliore del mondo!
Quale torta è più adatta di una torta di rose? Nessuna!
Quindi approfittando della sua assenza ho tentato la sorte... e visto che la sorte aiuta gli audaci, questo è il risultato!


::::: TORTA DI ROSE ALLE NOCCIOLE:::::

La ricetta è presa direttamente dal forum di Cookaround, ho fatto solo piccolissime modifiche, soprattutto per quello che riguarda il ripieno.


Ingredienti per l'impasto:
  • farina bianca, 250 gr
  • manitoba, 250 gr
  • lievito di birra, 1 cubetto
  • zucchero, 100 gr
  • uova, 2
  • burro, 80 gr
  • latte tiepido, 125 - 150 ml
  • vanillina, 1 bustina
  • sale, 1 cucchiaio
  • scorza di un limone
Ingredienti per la farcitura:
  • burro, 50 gr
  • zucchero, 100 gr
  • nocciole, 100 gr
In un recipiente ampio fai la fontana con la farina. Aggiungi nel centro zucchero, sale, vanillina, uova, scorza di limone e burro fuso.
Comincia ad impastare gradualmente. Scalda il latte (deve essere solo tiepido) e facci sciogliere dentro il lievito. Aggiungilo gradualmente all'impasto e continua ad impastare.
Servirà del tempo, almeno dieci minuti, per ottenere un impasto sodo ed elastico.
A quel punto mettilo a lievitare in un posto caldo per un'ora e mezzo.
Mentre lievita prepara la farcitura.
Monta il burro con lo zucchero ed aggiungi le nocciole tritate grossolanamente.
Dopo circa un'ora e mezzo l'impasto dovrebbe essere raddoppiato di volume.
Provate ad immaginare con quale ansia sono andata a sbirciare la pasta, pensando di trovare il collasso della materia... e invece no! ta daaaan! era lì, il doppio di prima, soffice, profumata e lievitata. Ho registrato nella mia memoria questo come il primo momento di gloria della giornata.
Bene, prendi questo piccolo capolavoro lievitato e stendilo su una spianatoia fino ad avere sfoglia di circa 35 x 50 cm. Aiutati con un mattarello ed un po' di farina e cerca di dare una forma il più regolare possibile alla sfoglia.
Spalma la farcitura sulla sfoglia e arrotola la pasta su se stessa, sul lato più lungo.
A questo punto taglia il rotolo formando tanti cilindretti: cerca di farli regolari. A me ne sono venuti soltanto 10...
Ricopri una teglia (meglio con cerniera) di carta da forno bagnata e strizzata e disponi i cilindretti nella tortiera, lasciando un po' di spazio tra l'uno e l'altro.
Lascia lievitare per almeno un'altra mezz'ora.
Trova un modo per impegare questo tempo di angoscia pazzesca: io ho fatto una passeggiata con nonna e Claudia. Nonna, proverbiale ottimista, mi ha detto: vedrai che ora non ti lievita!
E invece no! ta daaan! i rotolini di pasta ripieni erano ulteriormente lievitati, andando a toccarsi l'uno con l'altro. Altra polaroid mentale di un momento di gloria domestica.
Commento di nonna: se lo bruci lo senti! con questo voleva esprimere il concetto che, una volta che mi era lievitato qualcosa, avrei dovuto avere cento occhi per evitare che mi si carbonizzasse vanificando tutti gli sforzi.
A questo punto, inforna in forno caldo a 180°C per circa 30 minuti.
In teoria è buona fredda, sa di pan briosche ed è veramente confortante mangiare qualcosa che ti è lievitato. Ma come reistere? l'ho dovuta tagliare e sentire tiepida, e mi son quasi commossa!
Tant'è che mamma l'ha trovata senza una fetta... esigenza ci copione!

::::: ROSE CAKE :::::

If you want something to raise, don't call me. Me and yeast it's like Superman and kriptonite.
I've always been frightened by recipes asking for something to raise, until several people told me to face the experience with calm and serenity. And so did I.
The chance was Mother's Day some weeks ago.
My mum is passionate about roses: she has bushes of roses all around in the garden: pink, red, yellow and white. We love each other even if when talk we always seem squabblig about something. The rose cake was the perfect cake for mum.


Ingredients for the dough:
  • white flour, 250 gr
  • manitoba flour, 250 gr
  • brewer's yeast, 25 gr
  • caster sugar, 100 gr
  • eggs, 2
  • butter, 80 gr
  • warm milk, 125 - 150 ml
  • vanilla extract, 1 tablespoon
  • salt, 1 tablespoon
  • zest of 1 lemonn
Ingredients for the filling:
  • butter, 50 gr
  • caster sugar, 100 gr
  • hazelnuts, 100 gr
Put the flour in a large bowl and make a well in the middle.
Add sugar, salt, vanilla extract, eggs, lemon zest and melted butter.
Mix gradually all the ingredients together.
Warm the milk and melt the yeast into the milk: add gradually to the dough.
Knead for at least 10 minutes, until it is smooth and elastic.

Let rise for at least 1 hour and a half: it should double itself.
In the meantime, make the filling.
Whip butter and sugar and add hazelnuts, roughly chopped.
Now, let's have a look at your dough. I was scared, I tought I would have found a gravitational collapse.
.. but, actually, my dough was there, doubled, soft and fragrant. This was the first glorious snapshop pf the day!
Then, roll the dough on a flat working surface to have a rectangular sheet (almost 35 x 50 cm). Help yourself with a rolling pin and some flour in order to have a regular sheet.
Spread the filling onto the sheet and roll up the sheet on its longer side.
Cut the roll into small regular cylinders
.
Use a rounded mould with removable edges: cover it with greaseproof paper, formerly soaked and wringed.
Arrange the little rolls into the mould, leaving room beneath them.
Let to raise for at least half an hour.
Spend your time in a fun way trying to enjoy yourself, without thinking at your cake in a warm place. Don't be worried! My grandma was sure it wouldn't have raised, but... second glorious snapshot of the day: it was raised again!
Preheat the oven at 180°C
and bake for almost 30 minutes until golden.
You can eat this cake once cold: it's comforting and satisfying.. but I couldn't help! I was "forced" to slice it and taste a mouthful of warm delicious cake.

lunedì 25 maggio 2009

Ma quanto vi voglio bene?

Anche oggi niente ricetta, la lascio in serbo per domani una bella che mi rende molto orgogliosa, non vi anticipo nulla così vi lascio in suspance e poi domani venine numerosi a vedere cos'è! Oggi è un altro giorno di celebrazione, eh eh!

Quindi, rullo di tamburi, ecco i premi che mi ha regalato Lady Cocca, dal blog Sweet Lady Cocca e le sue amiche cuochine: il butterfly award, già ricevuto ed esposto in bacheca qui, e questo qui a lato, lo chiamerò Lemonade Award. Chi rifiuta una bella limonata fresca in questi giorni di calura estiva? io no di certo! Grazie mille Lady Cocca, dolcissima come sempre!
Lascio questi due premi a tutte voi che passate da qua (e passate anche domani che c'è un dolce sorpresa, soprattutto perché non speravo che mi riuscisse).

Poi è la volta di un giochino che mi ha passato Antonella di Pane al pane... vino al vino.
Devo scrivere 7 cose che mi caratterizzano. Lo faccio volentieri, cogliendo così l'occasione di presentarmi meglio a voi!
1. semplicità
2. genuinità
3. solarità
4. ingenuità
5. ottimismo
6. pigrizia
7. golosità

Vabeh, son venuta fuori una mezza Pollyanna... mi mancano solo le caprette!
Anche questo giochino lo lascio a tutte voi, così se avete voglia e non l'avete già fatto, mi raccontate un po' chi siete!

venerdì 22 maggio 2009

A cake for dummies

Hai presente quando guardi il monitor del piccì in cerca di ispirazione e.. niente?
come quando a scuola dovevi fare un tema o una descrizione ed eri pronta con il foglio bianco, la penna in mano e le migliori intenzioni di emulare, che so, Dacia Maraini, e... nulla?
Ecco, oggi mi sento così.
Stamani in macchina mentre ascoltavo gli ABBA mi dicevo: oggi gran post, voglio presentare la torta sarda di Sigrid a dovere, voglio fare una bella introduzione, oppure fare un post carino di ringraziamento per chi passa di qui e apprezza le mie ricetta anche senza dire nulla, oppure tentare uno di quei post simpatici, che ti fanno ridere e dire 'bada questa che simpatica che è!'... ma nulla!
Quindi forse la cosa migliore è parlare direttamente della torta sarda!
Avevo letto in tanti blog che è una torta a prova di imbranati, una cake for dummies, potrei definirla, e quindi avevo deciso di provarla, per vedere se e dove entrava in gioco questa sua peculiarità.
Bene, è semplicissima negli ingredienti, nel loro dosaggio e reperimento, nell'impasto e nella cottura, delicata e vera nel sapore.
E, soprattutto, viene bene anche se... scegli uno stampo da plum cake visibilmente troppo piccolo, che fa tracimare l'impasto in cottura dai bordi come la lava da un vulcano hawaiano, placida e tranquilla ma costante, così che sei costretta ad aprire il forno ogni 3 minuti per raccogliere con un cucchiaio l'impasto che scappa dal suo stampo.
Viene bene anche se provi a ributtarlo dentro sempre con lo stesso cucchiaio, a rigirare i lembi della carta da forno per evitare che facciano da scivolo alla lava, già di per sè fluida e vigliacca.

Viene bene anche se devi giustificare all'universo mondo che quel puzzo di bruciato che si sta diffondendo per casa non è la torta, no, poverina, lei cuoce bene, ma l'impasto fuggiasco che si è abbarbicato al fondo del forno e che sta bruciando, diventando del colore delle pietre laviche hawaiane, per rimanere in tema.
Quindi, l'unica avvertenza che mi sento di darvi è quella di utilizzare uno stampo grande da plumcake, o magari quelli da ciambellone, così che per lo meno potete sempre fare le fette quadrate, belline per questo tipo di dolce. Se non è così, riducete un po' le dosi, altrimenti vi ritroverete come me a fare un'esperimento di fisica e dinamica dei flussi all'interno del forno!

::::: TORTA SARDA DI RICOTTA E LIMONE ::::

Riporto qui la ricetta di Sigrid, infallibile!
Io ho usato la ricotta di capra anzichè quella di pecora, come richiesto dalla ricetta. Avevo una vaschetta di ricotta freschissima e biologica di
Camporbiano ed ho usato quella, che ha donato al dolce un sapore inconfondibile, forte certo, ma veramente ottimo per chi piace.


Ingredienti:
  • farina, 300 gr
  • zucchero, 300 gr
  • ricotta di capra freschissima, 300 gr
  • uova, 3
  • limone, 1
  • lievito per dolci, 1 bustina
  • zucchero a velo per spolverare
Lavora zucchero e ricotta insieme con una forchetta. Aggiungi i tuorli, la buccia grattugiata del limone e il succo del limone, poi farina e lievito. Monta a neve gli albumi ed aggiungi anche quelli.
Versa in uno stampo da plumcake e inforna a forno caldo a 180°C e cuoci per 40 minuti finché la torta non è dorata o uno stecchino infilato nel mezzo ne esca asciutto.
Mangia fredda spolverata di zucchero a velo.
Si conserva benissimo per più giorni ed è ottima per colazione o merenda.


::::: SARDINIAN CAKE WITH RICOTTA CHEESE AND LEMON :::::

This is a typical cake from Sardinian, made with fresh ricotta cheese. You can use sheep ricotta cheese as required by the recipe, but I tried it with goat ricotta cheese and it has become a very peculiar cake, with a strong and intense flavour, but really delicious.
It is a cake for dummies: easy ingredients, easy making and easy baking.
I managed to have a perfect cake even if I chose a wrong mould, definetly too small, and I kept on opening the oven to remove living mixture poring out from the mould as lava from an Hawaiian volcano!
So, the only advice is: use a proper plum cake mould, look after the size!


Ingredients:
  • flour, 300 gr
  • caster sugar, 300 gr
  • fresh goat ricotta cheese, 300 gr
  • eggs, 3
  • lemon, 1 (juice and grated zest)
  • backing powder, 1 large tablespoon
  • icing sugar
You can read the original recipe on the Cavoletto web site.
Preheat the oven at 180°C.
Stir ricotta cheese and sugar with a fork.
Add egg yolks, lemon zest and lemon juice, then flour and baking powder.

Beat the egg whites and add them to the mixture.
Pour into a cheesecake mould and bake for 40 minutes until it gets golden or a skewer comes out dry.
Let cool and dust with some icing sugar.
Keep it in a dry place and you can eat this cake for days, it's extremely good for breakfast!


giovedì 21 maggio 2009

Cerbiatti e farfalle: uno zoo!!

Ieri ho ricevuto due premi che mi hanno fatto molto molto piacere.
Sì, perché da quando ho aperto il blog spinta dalla voglia di condividere e di raccontarmi attraverso le mie ricette e i miei pensieri, ho 'incontrato' virtualmente persone interessanti, simpatiche, che condividono i miei stessi interessi, che hanno sempre il tempo, nonostante il lavoro, la famiglia, i figli e la casa, di passare a fare un saluto, a dare un consiglio o a strapparmi un sorriso! ...ecco, mi son persa, qui sto facendo come l'Ulisse di Joyce...
dicevo, visto che ho incontrato persone così valide, apprezzo molto quando poi mi arriva uno di questi premi dalle succitate persone valide e adorabili, e vi ringrazio tanto!!

Quindi grazie alla simpaticissima Mirtilla di Angolo Cottura per il Premio Bambi: una delle rubriche che preferisco del suo blog è la cucina per single... chissà perché?


Grazie poi alla dolcissima Chiara di Un pizzico di Magia per aver fatto posare il Butterfly Award nel mio blog: ci sta benissimo una farfallina in mezzo ai colori del mio taccuino virtuale! Sappi che ho in serbo per te tantissime altre ricette Tuscan Style!


AGGIORNAMENTO!
Grazie anche a Francesca di La mia cucina, che oggi mi ha regalato un'altra farfallina e l'Hard Working Food Blogger: questo lo apprezzo tantissimo perché a volte è proprio na faticaccia!!


Chiudo il post di oggi segnalando un'iniziativa che approvo a pieno di Evelyne di Pasticci e Pasticcini, che ha invitato tutti i suoi lettori a manifestarsi nel post odierno, dove offre the e pasticcini, lasciando un commento di saluto.

AGGIORNAMENTO ULTERIORE
Vi porto i saluti di un'amica lontana nello spazio ma vicina a tutti.. una che mette il pranzo nella schiscetta, che in inverno non ha bisogno di termosifoni, che vive in una città bellissima e colorata sul mare, che ultimamente è alle prese con trasloco e promozione, una a cui è caduto l'adorabile Jamie Oliver nella schiscetta - fortunata lei - indoviate chi sia??
Sì, è lei!! Viz manda un abbraccio e un saluto a tutti voi! Presto le riallacceranno internet e tornerà nel nostro mondo!

mercoledì 20 maggio 2009

La cucina di nonna Menna: i pici alla Senese

PER LA VERSIONE IN ITALIANO VI RIMANDO ALLA RUBRICA DI MADE IN KITCHEN!


Today we'll hit the second episode of our Tuscan cooking session.
It is worth saying though that "tuscan cooking" it is not really an appropriate way to define it..or better..them!!
I'll try to explain.. if you'll ask my granny: 'oma let's do a tuscan cooking column...What could we prepare? ..why not make a delicious trippa? She would answer.."what?? Trippa is from Florence, it is not a local dish then! (about 35 km n.d.r)".
Tuscany infact, as used to be a Gran Duchy, it is still..nowadays, ideally divided in different traditions, habits, customs.. that still oppose, even in the cooking way, Siena to Florence, or Pisa to Arezzo...

That is why I decided to illustrate a dish really rooted in my geographical area... or better - to be precise ( as my granny would say), time - honoured in Siena and in all the south part of the Siena zone. I am talking about the beautiful Val d orcia and of all the wonderful small medioeval villages that still mantain unchanged their appeal vico....
Few years ago I made a Val d'Orcia tour with few friends and we stopped over in Bagno Vignoni for dinner.
Bagno Vignoni is really the most enchanted village I have visited; its beautiful medioeval square with a huge swimmingpool of thermal water!
The four of us had pici as pasta dish!

::::: PICI PASTA :::::


PICI are big, thick, hand - home- made spaghetti, typical of the country tradition of home making pasta. They are made just of flour and water. That's it! No eggs.
In Siena the typical sauces for pici are 2 mainly (although few more obviously exist): AGLIONE SAUCE, that could be translated as the mother of all the garlic sauce! and with bread crumbles.. a classical ( bread crumbles roasted in olive oil).

Ingredients for 4 people:
  • flour, 300 gr
  • warm water, 150 ml
  • extra virgin olive oil
  • salt
Put the flour on a large wooden working surface, make a well in the center of the flour and add the water little by little, stirring with your hands until a dough is formed.
The needed quantity of water may be different time by time.
Knead the dough until firm, compact and smooth.
Let it stand for 30 minutes at room temperature.

Now you have two way to make PICI.
You can roll the dough into long thick noodles with your hands or you can use the apposite rolling pin (see the picture below).


Roll out the dough into a thick sheet (at least 5 mm), then use the pici rolling pin to make deep cuts in it. Then, take out one noodle after the other, streching them with your hands.


Place the pici on a sheet tray dusted with flour and set aside to dry.
Boil them in steaming water as common fresh pasta.
The pici will be one different from the other: it's their beauty!


lunedì 18 maggio 2009

Fior di patate | Potato flowers

Ed anche questo weekend è passato.
Questa volta niente passeggiate in campagna o meditazioni new age nella natura, ma una bellissima festa di raccolta fondi per l'Abruzzo a Firenze - che ci ha dato delle enormi soddisfazioni in merito ad adesioni e divertimento - ed un pomeriggio di shopping da turista sempre a Firenze ieri (sia lodato l'inventore di H&M, quello che io chiamo l'Ikea dei vestiti. Ora l'estate può arrivare, son pronta!)

Andando alla ricetta, ho riadattato questa del Cavoletto. L'ho già provata due volte, cambiando le erbette aggiuntive e i formaggi dentro, ed ogni volta è una sorpresa di gusto. E' molto versatile e veloce, si presenta bene ed è un piatto completo con un'insalatina verde.

::::: FIORI DI PATATE :::::


Ingredienti per 20 fiori:
  • patate medie, 6
  • uova sbattute, 2
  • parmigiano, 3 cucchiai
  • emmenthal a cubetti, 100 gr
  • rosmarino, 2 rametti
  • farina, 2 cucchiai
  • pangrattato, 5 cucchiai
  • olio extravergine di oliva
  • sale&pepe
Lessa le patate e schiacciale con una forchetta. Aggiungi tutti gli altri ingredienti e mescola bene per ottenere un composto omogeneo e abbastanza sodo. Se ti pare troppo morbido, aggiungi ancora un po' di pangrattato, ma poco per volta, perché poi fa subito assodare l'impasto.
Forma le polpettine passandole nel pangrattato ancora una volta, disponile su una placca da forno unta e irrorale con un po' d'olio evo. Inforna in forno caldo a 180° per 25 minuti, passandole al grill gli ultimi 5 minuti.
Questa combinazione di ingredienti (rosmarino + emmenthal) rende le polpettine dolci e delicate.
La prossima volta proverò con del pecorino!

::::: POTATO FLOWERS :::::


Ingredients for 20 flowers:
  • medium potatoes, 6
  • whisked eggs, 2
  • grated parmesan, 3 tablespoons
  • diced emmenthal, 100 gr
  • rosemary, 2 springs
  • flour, 2 tablespoons
  • breadcrumbs, 5 tablespoons
  • extravirgin olive oil
  • salt&pepper
Boil the potatoes and mash them with a fork.
Preheat the oven at 180°.
Add all the other ingredients and mix thoroughly until you have a well blended and firm mixture.
If it is still too soft, add some breadcrumbs more, but little by little, because they harden it all at once.
Make some potatocakes and press them into breadcrumbs once more, put them in a greased baking-tin and sprinkle them with some extra virgin olive oil
Bake them for 25 minutes, turning to grill for the last 5 minutes.
This mix (rosemary and emmenthal) makes the cakes sweet and delicate.
Next time I'll try with pecorino cheese.

venerdì 15 maggio 2009

Lunch box, episode 2

Ecco il secondo episodio dei miei pranzetti in ufficio, questa volta vi mostro il fuori di sguincio di una finestra, più che l'interno, perché ormai già conoscete il mio piccì!
Si tratta di una frittata, la più semplice delle frittate, quella di patate, leggermente modificata per essere più riempitiva ma più leggera.
Come al solito, fatta la sera prima e poi scaldata al microonde torna come appena fatta. Accompagnata da un'insalatina verde e arancione (lattuga e carote) è un pasto completo e leggero.

::::: FRITTATA DI PATATE E ZUCCHINE :::::


Ingredienti:
  • patate medie, 2
  • zucchina, 1
  • porro, 1/2
  • latte, 50 ml
  • olio evo, 2 cucchiai
  • aceto, 2 cucchiai
  • sale & pepe
Sbuccia le patate e tagliale a cubetti. Fai a cubetti anche la zucchina.
Lessa tutto in acqua salata con 2 cucchiai di aceto fino a che patate e zucchine non sono morbide.
Scolale e poi saltale in una padella antiaderente con mezzo porro affettato sottile sottile.
In un piatto sbatti 2 uova con sale&pepe e un po' di latte, poi versa il tutto sulle verdure saltate e fai rapprendere l'uovo. Rigira la frittata aiutandoti con un piatto se - come me - sei un po' imbranato. Fai cuocere per ancora un minuto e togli dal fuoco.

Partecipo anche con questa alla raccolta delle mitiche Babs e Viz.

::::: POTATO & ZUCCHINI OMELETTE :::::

Here the second episode of my office lunch box. This time, have a look outside my windows, since you already know my computer.
This is one of the most classic omelette, a potato omelette, slightly varied to be more lighter but more satisfying.
As usual, it is made the day before and warmed up in the microwave, and you get a just made omelette! Eat it with a side salad of lattuce and carrots and you'll have a complete but light meal.


Ingredients:
  • medium potatoes, 2
  • zucchini, 1
  • leek, 1/2
  • milk, 50 ml
  • extravirgin olive oil, 2 tablespoons
  • vinegard, 2 tablespoons
  • salt & pepper
Peel and dice potatoes. Dice zucchini too.
Boil them in salted water with 2 tablespoons of vinegard until the vegetables are soft and tender.
Drain and sauté them in a non stick pan with some leek, thinly sliced.
Whisk 2 eggs with salt&pepper and some milk and pour the mixture into the pan to cover the vegetables.
Make the eggs set, then turn upside down the omlette (with the help of a dish if you're clumsy as am I) and let it set for a minute more. Now it's ready!

giovedì 14 maggio 2009

Tortine integrali con carota e mela | Tiny cakes with apples and carrots

Arriva l'estate. E cosa c'è di più bello che ritagliarsi 20 minuti la mattina, prima di andare a lavoro, per fare colazione fuori al sole, sognando di essere in vacanza, ancora per un po', ancora per 5 minuti, prima di riprendere la macchina ed andare a lavoro?
La colazione a casa mia è un rito strano.
OK, ci sono i giorni di lavoro e di scuola, e in quei giorni facciamo colazione in momenti diversi in cucina, dandoci il cambio, chiacchierando velocemente tra noi (c'è chi ha poteri medianici, vedi Claudia che riesce a parlarmi e a farmi l'imboccallupo per la giornata giù da cucina mentre io dormo e rispondo nel sonno dal letto di camera mia).
Poi ci sono i giorni di festa! Mamma si alza presto e fa colazione da sola, nel silenzio più assoluto, con la solita tazza di latte e caffè con le fette biscottate che beve da quando la conosco. Il latte deve essere bollente, ustionante direi. Le fette biscottate sono 3. E mezzo. Il mezzo è quello che toglie la fame, dice lei. Mentre mangia legge un libro o fa le parole crociate. La colazione è il suo momento di pace e vuole essere lasciata sola.
Poi arriviamo noi, caciaroni, mangioni e desiderosi di provare nuove colazioni. Fuori mangiamo biscotti con le marmellate di mamma, pane tostato, succhi, latte, yoghurt. Babbo si diverte e quando ci sveglia d'estate ci dice: gnamo che si va a fare colazione fòri, si fa finta d'esse americani in vacanza! Non so perché americani, ma ci piace da matti!
Tornando a bomba, queste tortine che vi propongo potrebbero essere un perfetto ingrediente delle prossime colazioni "all'americana"!

::::: TORTINE INTEGRALI CON MELA E CAROTA :::::


Ingredienti:
  • farina integrale, 150 gr
  • uova, 2 sbattute
  • zucchero, 125 gr
  • olio extravergine di oliva, 100 ml
  • carote pelate e grattugiate, 100 gr
  • mela sbucciata e a cubotti, 100 gr
  • uvetta, 4 cucchiai abbondanti
  • sale, 1 cucchiaino
  • lievito in polvere, 1 cucchiaino
  • bicarbonato, 1/2 cucchiaino
  • cannella, 1 cucchiaino
Per farli, ormai seguo il procedimento imparato per i muffin.
Preriscalda il forno a 180°C.
Prima metti tutti gli ingredienti secchi in una ciotola capiente (farina, uvetta, zucchero, lievito, sale, bicarbonato, cannella, carote e mela - a tal proposito, copri ben bene carota a mela con al farina in modo che non si ossidino).
Poi, in un altro ciottolino mescola uova e olio.
Unisci questo composto al mix di ingredienti secchi e mescola velocemente.
Riempi degli stampini da muffin quasi fino al bordo (non cresce tanto, rimangono piccole tortine) e cuocili in forno per circa 25 - 30 minuti, facendo la prova dello stecchino.
Si conservano bene in un contentore ermetico per lacuni giorni.

::::: TINY CAKES WITH CARROTS AND APPLES :::::


Ingredients:
  • wholemeal flour, 150 gr
  • eggs, 2 whisked
  • caster sugar, 125 gr
  • extravirgin olive oil, 100 ml
  • peeled and grated carrots, 100 gr
  • peeled diced apples, 100 gr
  • raisins, 4 whole tablespoons
  • salt, 1 teaspoon
  • baking powder, 1 teaspoon
  • sodium bicarbonate, 1/2 teaspoon
  • cinnamon, 1 teaspoon
As always, I follow the muffin making directions.
Preheat the oven to 180°C.
Mix all the dry ingredients in a large bowl (wholemeal flour, caster sugar, raisins, baking powder, sodium bicarbonate, salt, cinnamon, carrots and apples - talking about that, cover carrots and apples with some flour, to prevent them from getting spoilt).
In an other bowl, mix eggs and olive oil.
Combine dry ingredients with egg and olive oil mixture.
Pour into tiny muffin moulds and bake for 25 - 30 minutes, or until a skewer comes out clean and dry.

mercoledì 13 maggio 2009

La cucina di nonna Menna: i crostini neri

Oggi è il gran giorno! Su Made in Kitchen esce la mia rubrica dedicata alla cucina toscana. Vi rimando qui, quindi, per il primo piatto scelto, i crostini neri! Qui vi lascio la versione in inglese.


Tuscany is bread without salt, is a good extravirgin olive oil, is a meat grill with friends, roasted chicken with potatoes and wild fennel, is cacciucco (a fish soup) on the seaside, Siena panforte and Florence schiacciata, is rosmary and sage... Tuscany, for me, is Granny Menna's Cooking.

Granny Menna is how I called my grandmother Marcella as a child.

Granny picks up wild herbs to make salad; as soon as mushrooms come out she runs into to wood to find them: here it is her biggest passion.

Granny belives to be an Etruscan woman, with her roots firmly planted in her country.

Granny knows how things are supposed to be done, because that is the way they're written in Pellegrino Artusi cook book. Aunt Pasquina gifted granny with this book when she got married: now it is yellowed with age, with some pages missing and old pictures as bookmarks.

Granny loves cooking and trying new recipes, but don't tell her she's good in cooking because she will shield herself saying that nothing comes as it should be when she cooks!

And yet, thanks to her delicious lunches, made for me when I came back home from school, now I am what I am, not skinny and thin, but curious about new flavours and willing to try new things.

Yes, then there is me... keen on oriental cooking, british lover, fond of spices and far away flavours. But it's time to give a chance to my tuscan cooking, trying to understand better those recipes that made me what I am, with the help of Granny and old uncle Pellegrino Artusi, a lively old man who will speak through the pages of an ancient book.
So, let's start with thew firts recipe.

::::: CROSTINI NERI - CHICKEN LIVERS CROSTINI :::::


These are the appetizers that should be done for great occasions and holidays.
When granny was a child, these crostini were made during threshing days, when the farmyard was crowded with people, men were working in the fields and women were cooking for them.

Since I was born, these crostini have always been present for christenings, weddings, birthdays and Christmas days.
This is the reason I have chose to start with appetizers - principii, according to old Pellegrino Artusi.
This is the way granny and mum make crostini neri, in a simple way. The smell of butter mingled with livers smell reminds me of early Christmas mornings. It cuddles you and brings you in the middle of Tuscan countryside.

Once you have made it, you should resist the temptation to eat spoonfuls of it!
It is delicious spread on a toasted slice of tuscan bread: you can soak the slices of bread with chicken broth (as my Aunt Silvana does), butter them (as granny does) or use them as they are (as my mum does)... the point is to use the patè still hot and steaming.


Ingredients:
  • chicken livers, 400 gr
  • red onion, 1/2
  • carrot, 1/2
  • celery, 1/2 stalk
  • capers, 3 tablespoons
  • leek, 1/2, just the white part
  • sage, 5 leaves
  • rosemary, 1 spring
  • bay leaves, 1
  • butter, 50 gr
  • water, 50 cl
  • anchovy paste
  • salt
Directions:
Rinse chicken livers and put them in a saucepan with the other ingredients (onion, carrot, celery, cappers, leek, sage, rosmary, bay leave, butter), coarsely chopped.
Don't forget to use a red onion, not white.

Why granny? Because with dark things you should use a red onion!


Season livers with salt: use a very tiny pinch of salt, because the tastiness is due to anchovy paste, that you are going to add at the very end.
Stir frequently and let cook for about 35 minutes, adding once in a while some tablespoon of water: livers should remain soft and wet.
When livers are done, put all the ingredients in a food processor or use a mill to have a patè.
This sauce is good when it remains rough, not too velvety: it should keep its rustic caracter!
At the very end, add little by little some anchovy paste and whip with some butter, tasting each time to find the right tastiness.
You can made it the previuos day: when it's time to serve it, heat the sauce, adding some butter or chicken broth.

martedì 12 maggio 2009

Comincia l'avventura!

E' ufficiale!
Da domani, e per ogni mercoledì, mi troverete su Made in Kitchen con una rubrica tutta mia dedicata alla cucina toscana! Sono davvero felice ed emozionata, sarà una scoperta per me, prima che per voi!
Per questo, come già anticipato, devo ringraziare Giulia, Community Manager di Made in Kitchen, con la quale siamo entrate subito in sintonia, e la mitica Babs, fonte di ispirazione e di coraggio, che ogni volta mi stupisce per quanto sembra che ci si conosca da sempre!

Per riscaldare i motori e presentarmi a tutti gli utenti di Made in Kitchen oggi trovate la ricetta del patè di pomodori secchi! Un patè rosso, come il fuoco e la passione: che sia di buon auspicio per una collaborazione divertente e interessante per tutti!

:::::::::::::::::::::::::::::::::::::::::::::::::::

It's official!
From tomorrow, and on every Wednesdays from now on, I'll be on Made in Kitchen with my own 'column' dedicated to the tuscan food and cooking.
I'm really happy and thrilled about that: it would be a real discovery, for me and for you! I'll keep on posting the English version here, don't worry.

So, I want to thank Giulia, Made in Kitchen Community Manager, because we have been immediately on the same wavelenght, and Babs, source of inspiration and courage, because it seems we have always known eachother.

lunedì 11 maggio 2009

Molleux a la banane

Ormai è diventata una sana abitudine: il venerdì sera lascio il XXI secolo e mi immergo per un po' in un bellissimo mondo senza computer e stress, nella campagna, nelle sagre di paese... questa volta sono stata a Casole d'Elsa, 5 km in linea d'aria da casa mia, alla sagra dell'Antipasto.
C'era anche il ritrovo delle vecchie 2 cavalli da tutta Italia, una pesca di beneficienza e tanta carne alla brace!
Domenica è stato invece il giorno dedicato alle produzioni artistiche!
Sfogliando il Saveurs francese che mi aveva portato Claudia da Paris mi sono incantata a guardare una torta semplicissima e soffice, che profumava di banane anche dalle pagine della rivista.
Dopo un rapido consulto e una essenziale traduzione simultanea, io e Claudia abbiamo infornato un Molleux a la banane strepitoso!

::::: MOLLEUX A LA BANANE :::::


Ingredienti:
  • farina, 220 gr
  • zucchero, 200 gr (io ne ho messi solo 180 gr)
  • burro, 150 gr
  • banane mature, 3
  • uova, 2
  • yogurt bianco, 1 vasetto sa 125 ml (io l'ho usato alla banana)
  • cannella, 1/2 cucchiaino (io non l'ho messa)
  • vanillina, 1 bustina
  • lievito, 1 cucchiaio
Preriscalda il forno a 180°C e fondi il burro a fuoco dolce.
Schiaccia le banane con una forchetta se sono molto mature, altrimenti aiutati con il mixer, fino ad ottenere una purea omogenea. Incorpora in sequenza yogurt, uova, zucchero, vaniglia e sale.
Aggiungi poi setacciando farina e lievito, poco per volta per non formare grumi.
Termina aggiungendo il burro intiepidito.
E' importante la sequenza, dice la ricetta, perché è questa che dà il carattere al molleux. E noi ubbidiamo!
Versa in una teglia imburrata di 20 cm di diametro, non avendola ne ho usata una da 24 cm e infatti il dolce è venuto leggermente bassino.
Inforna per 45 minuti o fino a che lo stecchino non esce asciutto.
Mangialo freddo, tagliato a fette oppure a cubotti, molto simpatico da servire, magari con una spolverata di zucchero a velo o di cocco essiccato.

::::: MOLLEUX A LA BANANE :::::

Here I am, after a relaxing weekend. No computer, no stress. Just countryside and village festivals. On Sunday I tried this recipe form the French Saveur: it was calling me from inside the pages and I couldn't help! Thanks to Claudia, who translated for me the recipe, we baked a scrumptious Molleux a la banane!


Ingredients:
  • flour, 220 gr
  • caster sugar, 200 gr (I used just 180 gr)
  • unsalted butter, 150 gr
  • ripe bananas, 3
  • eggs, 2
  • natural yoghurt, 125 ml (I used banana yoghurt)
  • cinnamon, 1/2 teaspoon (I didn't use it)
  • vanilla extract, 1 tablespoon
  • baking powder, 1 tablespoon
Preheat the oven at 180°C and melt the butter on a medium fire.
Squash bananas with a fork if they are ripe, otherwise use a blender, until you have a soft and well-blended mash. Stir in sequence yoghurt, eggs, sugar, vanilla extract and salt.
Sift the flour with the baking powder and add it little by little, to avoid lumps.
Stir in, at last, the warm melted butter.
The sequence is very important, so says the recipe, because it's this order that gives the right character to the molleux.
Pour the mixture into a buttered mould. It was supposed to be a 20 cm diameter mould, but I used a 24 cm diameter mould, not having the right one: the cake, actually, was slightly thin.
Bake for 45 minutes or until a skewer comes out clean and dry.
Eat the molleux cold, sliced or cut into squared pieces, nicer to serve, sprinkled with icing sugar or dried coconut.

giovedì 7 maggio 2009

Meringata al fondente ::::: Dark Chocolate Meringue Tart

Torniamo per un momento al primo maggio.
Avevo a pranzo delle amiche di mia nonna simpaticissime, donne di enorme cultura, di memoria lunga e di notevole esperienza di vita, che sanno incantarti per come raccontano anche i fatti più semplici della vita, appassionate di arte, di natura e di buona cucina.
Volevo ringraziarle della loro visita con una torta solare e primaverile che concludesse un pranzetto toscano... pensavo ad una crostata con le fragole, quando mi sono ricordata che Grazia è allergica alle fragole!
Peccato avessi già fatto la base di pate sucrée... per fortuna ho rimediato con 2 tavolette di cioccolata fondente, ultimo guizzo invernale. Credo che poi dopo questa torta archivierò il cioccolato fino al prossimo autunno.

::::: MERINGATA AL FONDENTE :::::


Ingredienti per la pate sucrée (di Maxine Clark):
  • farina, 200 gr
  • zucchero semolato, 75 gr
  • burro, 75 gr (a tocchetti a temperatura ambiente)
  • tuorli d'uovo, 2
  • sale, 1 pizzico
  • vanillina, 1 cucchiaio
  • acqua fredda, 2-3 cucchiai
Ingredienti per la crema al fondente:
  • cioccolato fondente, 400 gr
  • latte, 150 ml
  • burro, 30 gr
Ingredienti per la meringa:
  • albumi, 2
  • zucchero semolato, 3 cucchiai
  • succo di limone, 2 gocce
Preparazione della base
In una ciotola capiente o su una spianatoia metti farina, sale e zucchero a fontana.
Metti nel centro il burro, i tuorli e la vaniglia. Con le dita lavora uovo e burro insieme fino a che non sembrano uova strapazzate (la ricetta dice così e rende bene l'idea!). Piano piano, con una paletta o la lama piatta di un coltello (o a mano se vuoi fare alla svelta come ho fatto io) butta la farina sulle uova fino a che non si amalgama. Alla fine versa 2 - 3 cucchiai di acqua e impasta velocemente, forma una palla, avvolgi nella pellicola e metti in frigo per mezz'ora.
Quando si è compattata, riprendila, stendila con un mattarello aiutandoti con un po' di farina e fodera una tortiera dal bordo basso di circa 26 cm di diametro.
Bucherella con la forchetta, copri con un foglio di carta da forno e dei fagioli e cuoci per 15 - 20 minuti in forno caldo a 190°C. Togli dal forno e passa a preparare la crema al fondente.

Il ripieno
Semplicissimo! A bagnomaria fai sciogliere il cioccolato fondente con il latte e il burro e mescola bene fino a che il composto non diventa lucido e liscio. Versalo nel guscio. Ora non rimane che ultimare la torta con la meringa.

La meringa
Ti ricordi quei 2 albumi rimasti soli soletti dopo che hai fatto la pate sucrée? Bene, prendili, metti un goccio di limone e comincia a montarli con le fruste fino a che non diventano belli sodi, compatti e bianchi, quindi per almeno 5 minuti. A questo punto, sempre montando con le fruste, aggiungi progressivamente lo zucchero e continua a montare fino a che la meringa non è bianchissima, lucida e luminosa. Versala sulla torta e sistemala come vuoi: io ho preferito metterla un po' a casaccio al centro, mi piaceva il tocco umano e grezzo, molto 'vero' che dava alla torta.
Inforna nuovamente in forno caldo a 200°C per 15 minuti o fnché la meringa non diventa dorata in qualche punto ed è ferma.
Lascia raffreddare prima di servire.

Per essere una torta nata sull'improvvisazione e pescando a casaccio da diverse ricette non era per niente male: forse la meringa doveva cuocere meglio, ma dolce e avvolgente com'era si sposava bene con la crema forte e amara al fondente.


::::: DARK CHOCOLATE MERINGUE TART :::::

Born as a strawberry tart, it has become a dark chocolate meringue tart thanks to the allergy of a friend! It is a dessert and a gift, made to thanks Maura and Grazia, granny's friends, who visited us last week. They are incredible story tellers, you can listen to them for hours, lost in their magic and enchanted world, made of memories and past life experiences.


Pate sucrée - Ingredients (Maxine Clark's recipe):
  • plain flour, 200 gr
  • caster sugar, 75 gr
  • butter, 75 gr (diced, at room temerature)
  • egg yolks, 2
  • salt, 1 pinch
  • vanilla extract, 1 tablespoon
  • iced water, 2-3 tablespoons
Darke chocolate filling - Ingredients:
  • dark chocolate, 200 gr
  • milk, 150 ml
  • butter, 30 gr
Meringue Ingredients:
  • egg whites, 2
  • caster sugar, 3 tablespoons
Pastry case preparation
Sift flour, salt and sugar into a mound on a clean work surface or into a large bowl.
Make a well in the middle and put inside the butter, egg yolks and vanilla extract.
Using your finger, peck the eggs and butter together until the mixture resembles creamy scrambled eggs.
Flick the flour over the egg mixture and chop it through with a palette knife (or your hands, if your're in a hurry) until it is roughly amalgamated.
Sprinkle with the water and chop again.
Bring together quickly with your hands, knead into a ball, wrap in clingfilm and chill for 30 minutes.
Roll out the pastry thinly on a floured work surface and line a tart tin (26 cm diameter).
Prick with a fork, line with foil and some beans and bake for
15 - 20 minutes in a preheated oven (190°C). Leave to cool and make the dark chocolate filling.

Dark chocolate filling
Sooooo easy! Place the chocolate, milk and butter in a small pan and cook in a bain-marie. Stir until melted and smooth. Pur into the pastry case and leave to cool. Now all you have to do is making the meringue.

The meringue
Do you remember those leftover egg whites from the pate sucrée? Good.
Place them in a bowl, add a few drops of lemon juice and beat with an electic mixer until they are soft, firm and white (at least 5 minutes). Then, gradually add the sugar and beat until the mixture is thick, glossy and shining white.
Spoon meringue onto the tart as you like. I love a human and messed touch.
Bake in a preheated oven (200°C) for 15 minutes or until the peaks are golden and the meringue is set. Leave to cool.


However born by chance and mixing together different recipes, it is a delicious cake.
Maybe the meringue should have been more firm and cooked, but it was sweet and velvety, ideal to balance the intense and strong dark chocolate filling.